

Leather 101: How To Stamp and Carve Leather For Beginners
Leather Carving & Stamping For Beginners
From belts to saddles, graduation caps to bridal bouquet wraps, you can find carved and stamped leather just about anywhere today! Looking to add something a little more challenging to your leather projects? Read on!
Stamping and carving are traditional methods of leather-working. This can also be referred to as “leather tooling".
As with any new venture, you will want to make sure you have the right tools and supplies on hand:
Supplies needed
- Vegetable Tanned Leather: This is the only kind of leather that can be carved on because it isn't stuffed with oils and wax.
- Sponge
- Water
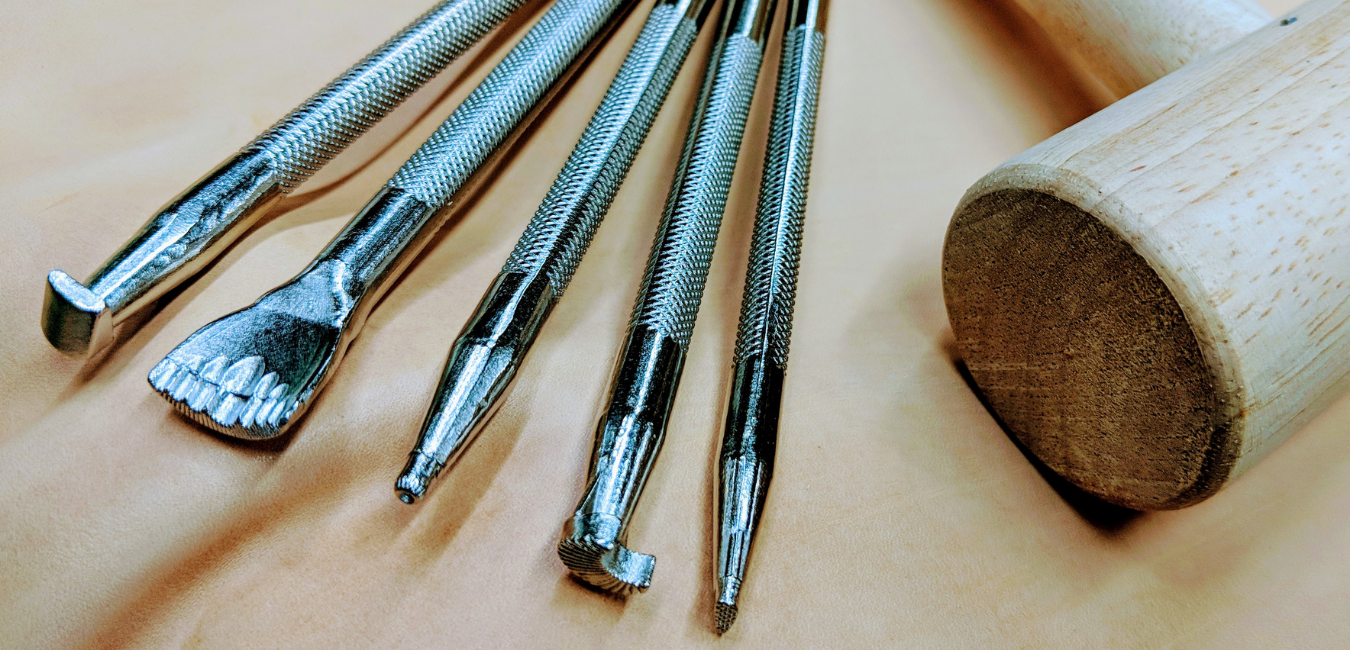
- Swivel Knife
- Stamping Sets
- Mallet or Maul: Do not use a metal hammer, it will damage your tools
- Tracing Paper
- Tracing Stylus
- Marble slab: Highly recommended but not an absolute must, a very hard surface is sufficient. Granite will also work. Any surface without a lot of bounce back will ensure your tools stay where you need them.
There are thousands of stamping/carving tools that an artist can use to create their design on their leather. However, as a beginner, you may want to start with a small set to get the hang of the basic process!
What's the difference between stamping and carving?


Stamping is simply using a stamp (typically metal) that will leave a 3-D impression on your piece of leather. This can include letters, numbers, shapes, and designs. These tools range in size and style.
Leather Carving, as the name implies, means carving your image into the leather creating more elaborate scenery and designs. This is where a swivel knife comes in handy. It allows you to cut into the surface of the leather to create more detailed shapes and figures. You then go back over these shapes with stamps and tools, lending even more detail to your design.
When stamping or carving on leather, always work on a marble slab or a hard surface to achieve the crispest impressions. You will be using a mallet or maul to hammer in your designs, so be sure your work surface is steady.
Now that you know the basic tools and the difference between both methods, you're ready to start!
Step #1: Trace the Image
When carving, choose the picture you want to carve into the leather and trace it onto tracing paper with a pencil. If you are creating a custom image, just draw it out ahead of time so you can transfer it over to your piece. When stamping, you will want to figure out your spacing and decide where your design will land.
Step #2: Prep the Leather
To prep the leather to receive impressions you will need to get the leather fairly wet, but not soaking. Using your sponge, apply water in a circular motion making sure to apply evenly, this allows the fibers in the leather to loosen and swell, allowing you to shape it. Apply the water evenly and allow to dry slightly before beginning your work. Should the leather dry entirely before you have finished, simply remoisten it again.
If you are just stamping and not carving, you will not need the following info. You are ready to start stamping now. Place your stamps where you want them, check your spacing, and get cracking!
Step #3: Transfer Your Design
Transfer the image on to your leather using your pencil or a stylus to indent the leather. You can also lightly draw the design directly on your leather if you feel confident in your design and layout but be mindful that it is not easy to remove these marks should you draw too hard and make a mistake.
There are a number of folks out there who will jump straight into cutting and do their designs on the fly. This takes a lot of practice to get to that point, so for now, plan ahead!
Step #4: Cut the outline
When carving, make sure your swivel knife is sharp before you begin, and then use it to follow the outline and main lines of your image. You will want to create a groove that is half the thickness of the leather.
How to hold and use a swivel knife
Take your index figure and rest in the cradle that's located at the top of the knife. Your index figure is the one that dictates how deep your cut will be. While applying pressure using your thumb, middle and ring fingers to maneuver around the corners.
Note: Be sure to take your time and cut towards you. This will help with making the depth of the cut the same throughout and give you more control.
Step #5: Bevel
Use your Craftool Z-B 197 beveler by striking the top of the handle with a mallet to enhance the lines you just cut with your swivel knife, giving it a 3D effect.
Step #5: Fill outline
Once you have your outline cut and lines beveled complete your image and add depth to it by creating shadows, fades, and borders using various stamping tools.
Once your image is complete just let it dry and you have created a masterpiece to show off to your friends and family.
How do you know which tools to use?
Play around with your tools and figure out what each one does and then just be creative. Sometimes the name of the tool will give you an idea of what its general use is for. For example, a shader would help you add shadow, or shade, to a larger shape. However, that doesn't mean that's the only way to use it!
Carving is an art form, therefore, there is no right or wrong, it all depends on the look you are trying to achieve. Carving takes time to master, so be patient and enjoy working with your leather while watching a flat surface turn into an amazing 3-D image.